
For a list of necessary items and links, see here.
Also there, see the disclaimer. This doesn’t take a genius or top notch mechanic to complete, so if you begin with your head outside of your ass you should finish in the same manner.
Lastly, I would like to apologize for the blurry photos ahead of time. They should do well enough, though a close-up setting on the camera and a tripod would have made them better.
So let us begin….
First, you need to assemble your hammer and trigger. There is a decently sized pile-o-parts and this gets some of them segregated and installed and out of the way .
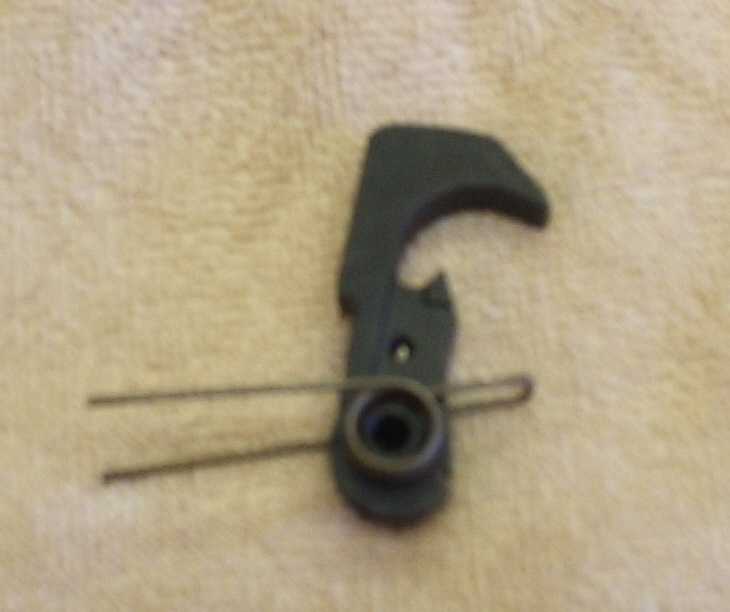
The Hammer: Find your hammer and hammer spring. Check to make sure your hammer has the detent clip-spring installed. If not find it and install that per the TM-220 first. Then install your hammer spring per the TM-220. You should end up with this.
Next, find your trigger, trigger spring, disconnector and disconnector spring. The TM-220 shows assembly for the 3-shot burst full-auto trigger group. Unless you have the proper federal paperwork for these parts, yours will look different and be missing a couple of pieces. Use your noggin and you’ll be able to figure it out. Unless you would like to practice your disassembly skills, do not confuse your disconnector spring with your bolt stop spring. While roughly the same diameter and length, the disconnector spring is the conical one and the fat end goes down.
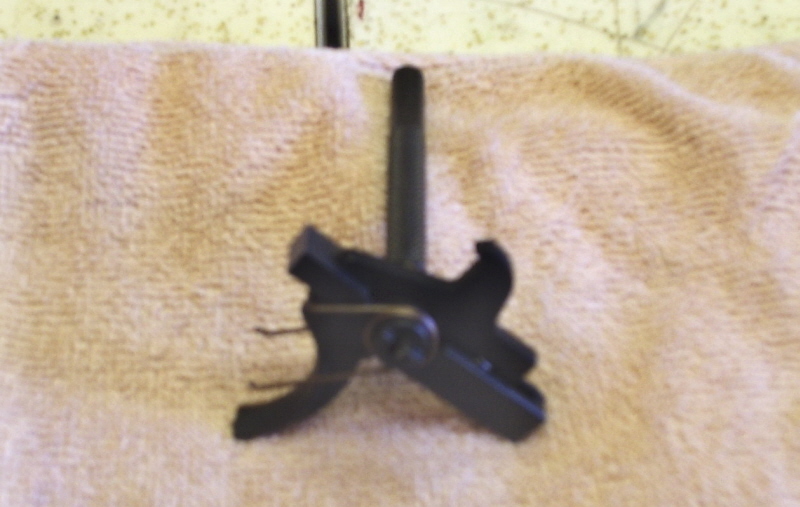
Assemble your trigger group according to the TM-220 around the 5/32 punch, ending up with this
Find your trigger pin and your hammer pin. The one with the groove in it is the hammer pin, set that one aside for a moment.
While holding the trigger group together so that it doesn’t fall apart, remove the punch and set it into the receiver. Make sure the legs of the trigger spring are forward. Line the holes up as best you can and work the punch through one side of the receiver, then the trigger group, and then the other side of the receiver. Take your trigger pin and insert it opposite of your punch and push it through the first side of the receiver, following the end of the punch closely. You should have to tap a bit with your brass punch for a snug fit.

Now do the same with your hammer assembly. Make sure the legs of the hammer spring rest on top of the trigger pin. Yes, it will feel like you are two-finger wrestling a bionic cricket. Insert the punch, then follow through with the pin.

There. That was the hard part.
The rest of the assembly will be upcoming in Part 3.
Pingback: Random Nuclear Strikes » Tidying Up for the Week
Pingback: Random Nuclear Strikes » AR Lower Parts Kit Assembly: Part 3