
We got our first serious rain of the Fall here last Wednesday and Thursday. (We got… about a third of an inch. You WA and OR residents are rolling your eyes now — I know, I used to live in the Willamette Valley).
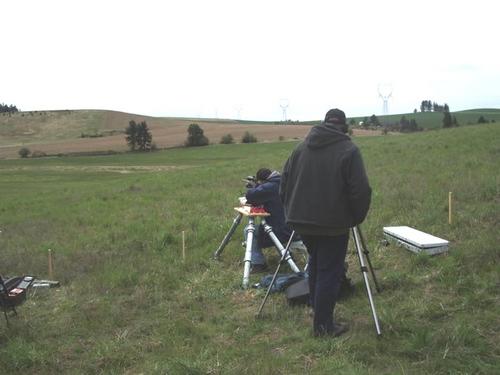
Anyway, I’d thought I’d covered everything that needed covering, but Sunday evening I walked around the corner of the house and realized I’d forgotten to cover the Boomershoot 2005 Pipe Bench, Winner of Kim DuToit’s Ugliest Shooting Bench Award.

It’s RUSTED! Actually, just an area around the threads on each leg, and the threads themselves.
Okay, I will freely admit it’s been two decades since I lived in a place where rust was something to worry about. I’m assuming the best way to fix this (once I break the rusted-together leg sections apart, which I don’t think will be too much of a chore) is just to douse the threads in oil and screw ’em in, screw ’em out, ad infinitum until the friction’s worn the rust off. Is there anything else I should do? I was going to paint it with a can of Rustoleum, but I hadn’t considered painting the threads because I figured any paint’d just wear off after a few assemblies/disassemblies.
Any thoughts? I feel stupid, but geez, in this climate I can leave stuff outside almost all year and never think about rust.
Cosmoline. The same stuff that protects guns in long-term storage.
Take said pipe-bench apart, remove the rust from the pipe-threads (female threads chuck a shotgun brush in a drill, male threads use the wire wheel on your bench grinder) and coat liberally with Cosmoline and re-assemble.
There’s no whooshy version in a spray can, you have to get the real article.
Cosmoline was formulated to stick to metal and NOT run until it gets to about 150 degrees, so it should serve the purpose.
Only downside: it WILL attract blown dust and debris.
Cool. I should probably keep some around anyway for caching purposes. I must have four or five articles with different “best ways” to remove Cosmoline from milsurps. Never seen one about applying it! 🙂
Thanks!
If the threads are rusted together, spray them down with Kroil, let soak a while, then break apart. Wire brush with more Kroil, it will dissolve the rust. Kano Labs, makers of Kroil, also sell a product called Exrust, I believe, it’ll cut it right off. Clean and degrease everything, wrap the threads with teflon tape, assemble and paint. The teflon tape will protect the threads from the paint, and allow easy assembly/disassembly. If the tape starts getting thin/worn, just wrap on some more.
People used to build telescope mounts with pipe. They’d use a little lapping compound with oil on the threads, then repeatedly thread the parts together and apart, to smooth them out. You can try that if you like. I built such a scope mount some years ago, did the lapping compound bit, then used the teflon tape where the mount axes spin. Slicker n’ snot. For your shooting bench, I assume you’d just want to hand tighten any joints.
Very cool! I am building another bench, so I think I’ll do one in Cosmo and one with tape to compare. All in the name of Science, don’t’cha know.
If I could make one other suggestion, check out Kee Klamps. They are quick and easy, and have a wide variety of fittings to assemble stuff with pipe/tubing. You won’t have to worry about threads at all! I’ve built a lot of stuff with them, they work as advertised. And, if you use aluminum pipe, you can cut the weight of your bench by a half or more.
http://www.keeklamp.com/us/
I came upon this website via the Gunthing and the Anarchangel where there is a discussion about portable shooting benches.
What is the purpose of the T joints part way down the angled legs?
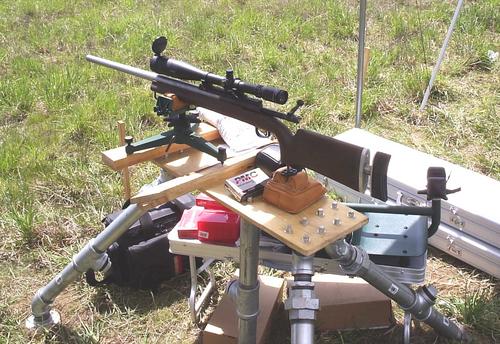
And, what is the diameter? that looks like 2 1/2 od in the pictures.
Yes it’s 2.5″ pipe. And no, I didn’t buy it all at once as I’m not independently wealthy.
Heh. You’re the first person to mention the T joints. Well, you’ve caught me out. When I built the bench, I wasn’t sure just how stable it would be, so I had the bright idea of including an access point to the interior of the legs so that I could pour lead shot (or sand, or something) into each one to make the thing heavier (I would have sealed the bottom of each leg with the squared-off-cap piece on each T-joint and jammed it into the dirt). As it turns out, the bench is solid enough that no additional weight is necessary. So as far as their intended purpose is concerned, the T-joints are superfluous.
However, the T-joints serve another, quite essential purpose that I didn’t grasp until I got to Boomershoot and couldn’t level the bench. The left-to-right incline of the hillside is so great that both in 2005 and this year I was unable to level the bench just by rotating the legs to different positions (although I came close). Instead, I replaced the bottom-most section of pipe (below the T-joint) on the two leftmost (downhill) legs with sections of pipe that were about four inches longer. Voila! Leveling the bench was a piece of cake after that.
Thus, the T-joints make it relatively easy to adjust bench height for terrain (or, I suppose, for taller and shorter shooters). Just pop in a different length of short pipe.