
Yay! My most substantive post in days (maybe weeks)!
Before we get started, let me put a couple items out for the general information of the non-welders out there, which will likely be most of y’all:
First, I have to take this test twice. The first is this one, the next will happen Monday and will be in the “Direct Overhead” position. I’ll take pics of that one too.
The piece you will see at the end will be destroyed during the final part of the inspection. Likely by this afternoon.They’ll bandsaw it into five pieces, two will get thrown away, two others will get bent into a U-shape. It can crack, but only a little. It is best to not have any cracks. The third will be saved and the two that were bent will get welded to it. I’ll get the pieces back on Monday. If I fail, I have to weld for another eight logged hours before I can retake the test. So, if I fail, I’ll be redoing it on Tuesday.
Also, this is a vanity exam. No one welds heavy plate with the TIG process. An eight inch weldment took me three hours. It could have been done in 15 minutes with MIG or 10 minutes with Dual Shield wire. I am only taking this test to get a piece of paper that says I know how to weld TIG. The potential employer I interviewed with in August will want the MIG and Dual Shield wire certifications, and I will get them before the quarter ends. But there is a different potential employer who is looking for people with TIG certs to manufacture and repair surgical equipment. That is why I want this cert.
Drop below the fold for the nitty-gritty (plus a bonus!).
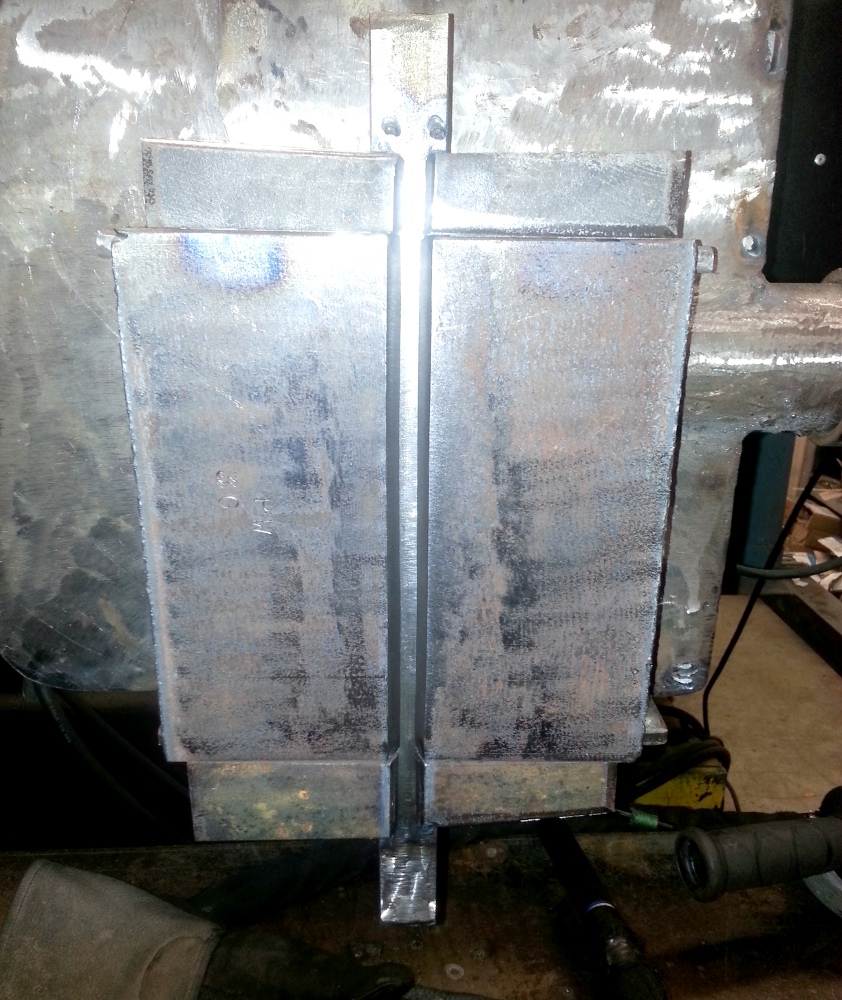
For the GTAW 3G Certification (TIG Heavy Plate) test, you first have to assemble your test piece.
The weld zone is eight inches long. It consists of two 3/8in steel plates which are each beveled at 22.5 degrees so that your root opening is 45 degrees, as well as a 1/4in thick by 1in wide backing strip that covers the entire length of the root opening. Your root opening can be a maximum of 1/4 in wide. Those are really the only requirements. You are allowed to extend the weld zone with beveled run-off tabs and strongbacks perpendicular to your test plate are highly recommended, but not required.
In the end, your test piece should look something like this
(sorry for the flash, I figured out to turn it off after a couple pics)
You, of course, want the bottom of your bevels to be as flush as humanly possible to your backing plate to prevent root gap. You also want your weld zone free of mill scale on both sides of your plates and the backing strip to try and prevent silica cracking.
Once you have your plate made up, the inspector (aka: my instructor) inspects them to make sure they are within the parameters and you are told to weld it into position. In this case, 3G is the Vertical position. Once in position, your plate is inspected and locked in. You are not allowed to move or otherwise rotate the piece in any way. Many a test has been failed by welders who did not follow this rule.
You are now allowed to begin the test.
First, you put in a nice hot root pass.
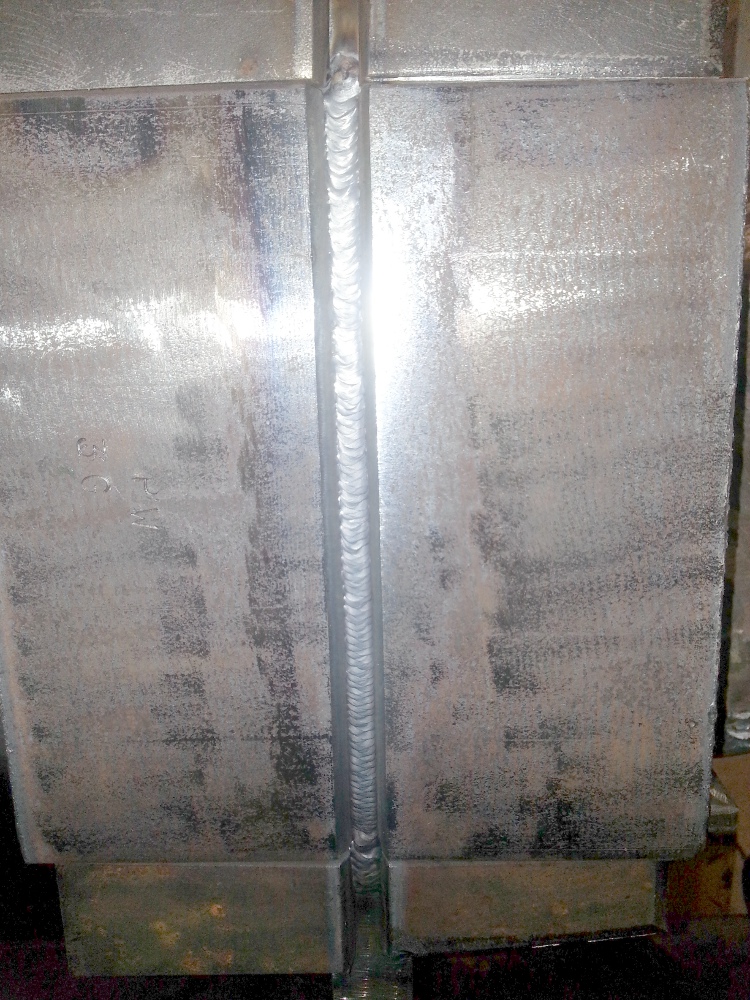
You then stop and need to have your plate and root pass inspected. If the inspector approves, you may continue to fill in the weldment until completion. This was not my prettiest root pass, but it took no convincing from me for it to pass.
Hot pass over the root pass and two fill passes later
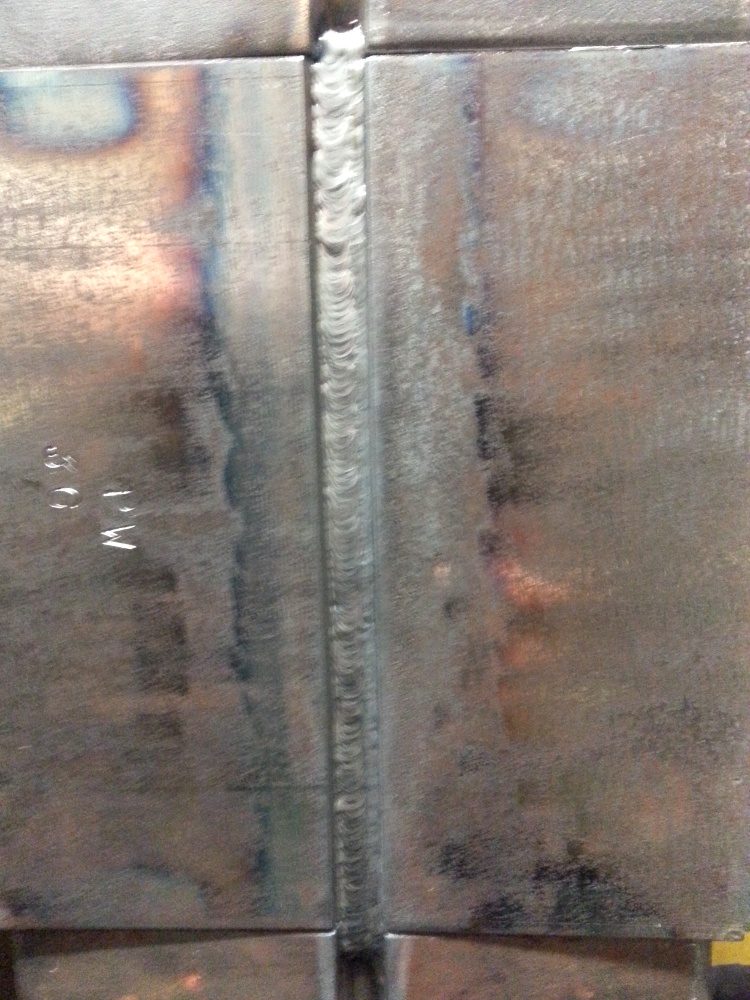
Four more fill passes

One fat fill pass up the middle
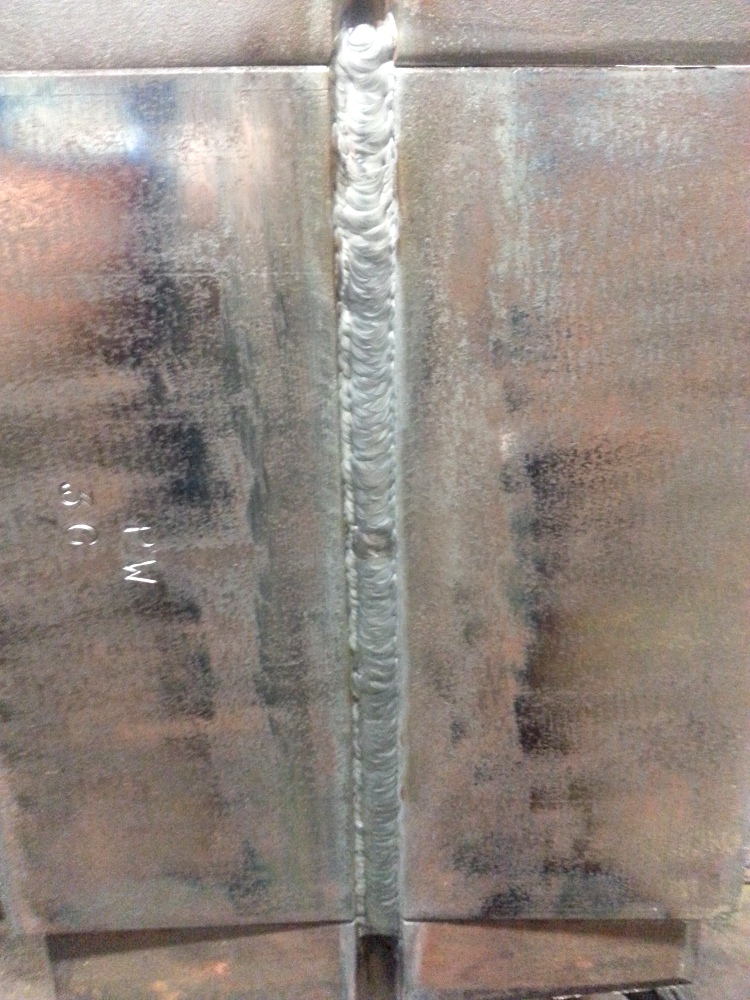
And finally, cover passes
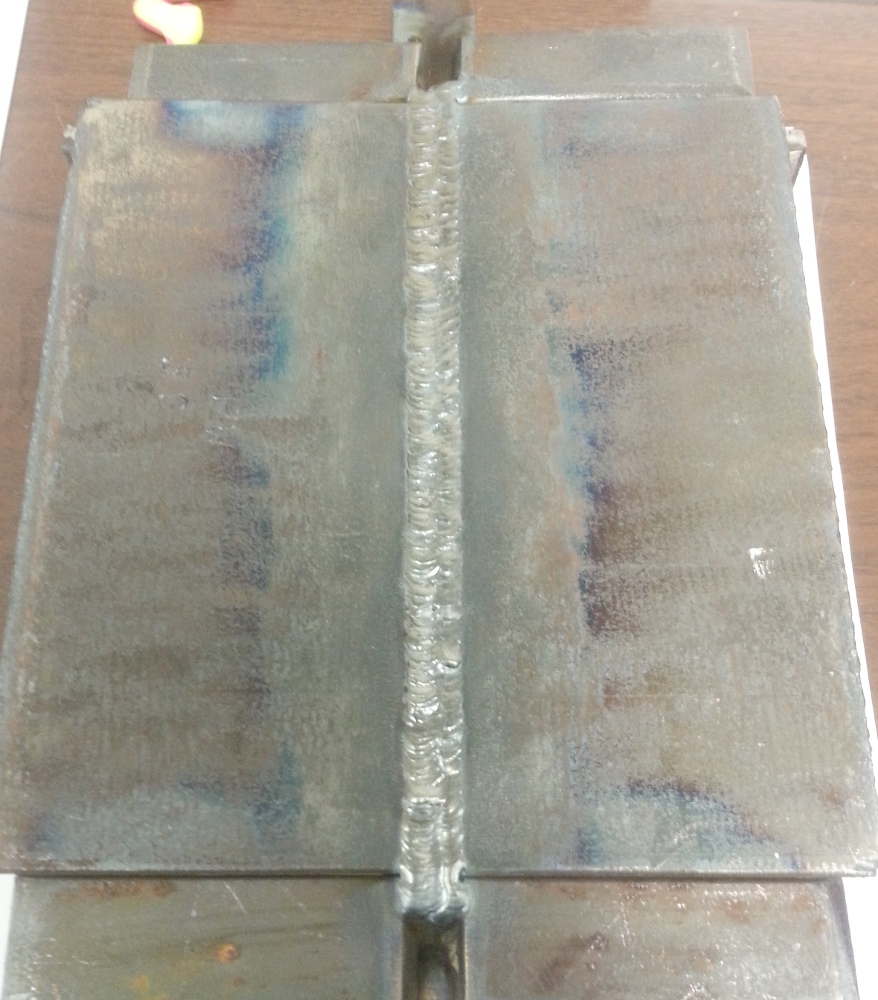
That shot was on the inspector’s desk. It had to be approved before I could remove it from the vertical table and once removed it has to go directly to his desk. Those might just be the prettiest cover passes I’ve done during the whole training process.
Like I said, I’ll know Monday if this weldment passes or not. Although, I did hear a rumor that my instructor will be in today, so I might go in for some practice on my overhead test and, if he’s there, see if we can do the bending portion of the test.
Now for the bonus!
Heating metal distorts it. Superheating metal (like you would during a TIG test) distorts metal a great deal. As an example, here are pictures of my strongback steel. They are 2in wide by 3/8in thick bar steel, notched 1/2in to allow for the backing strip.
They were arrow straight when the test started.
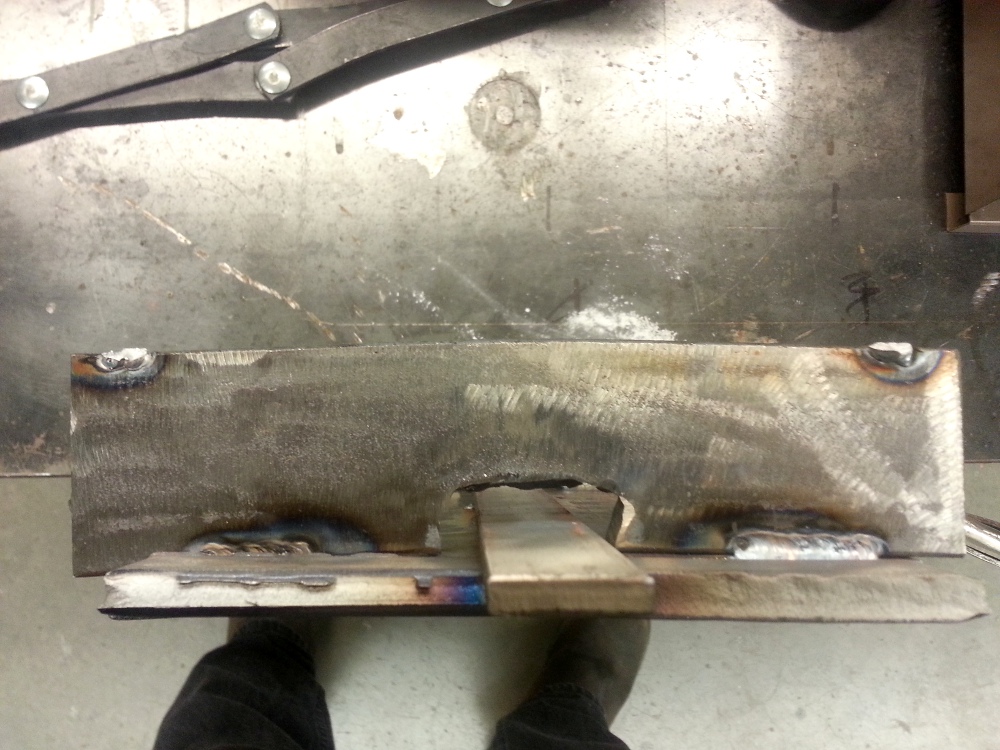
The tack spot on the right was flexed so hard, I felt it crack during the test.
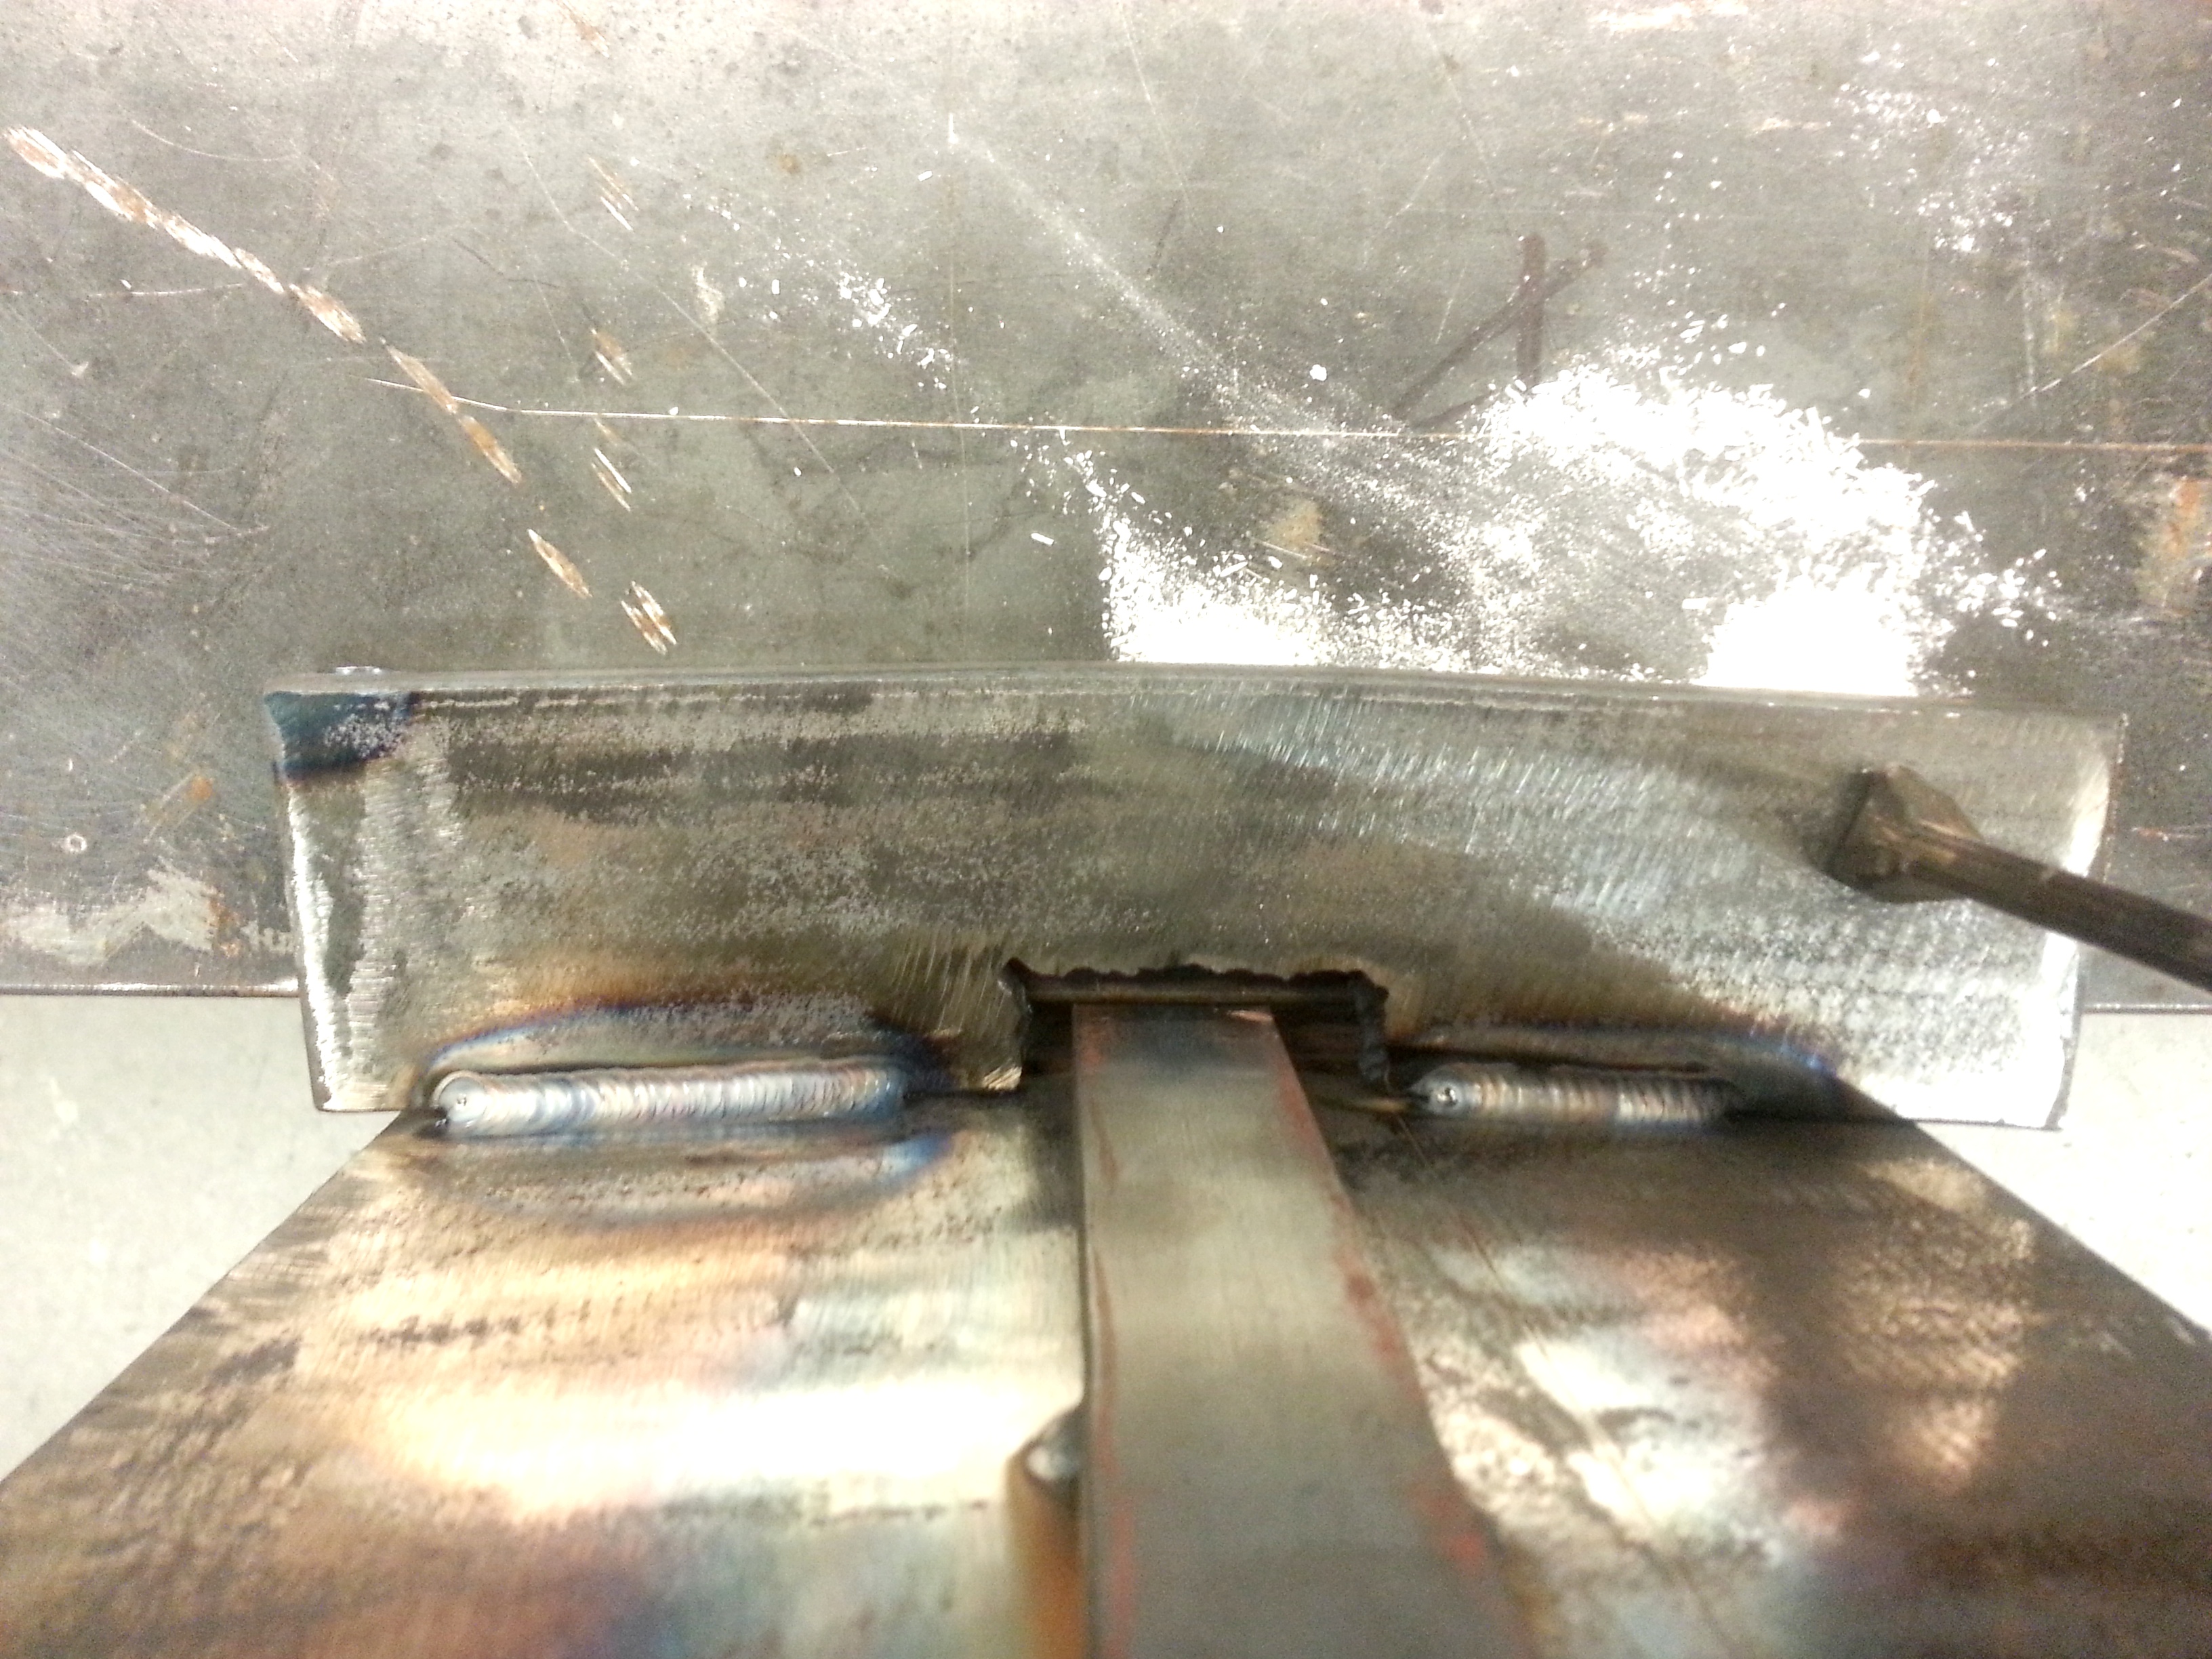
If I had not put the strongbacks on there, these would likely be nearly at a 150 degree or smaller angle instead of the current 175 degree angle.
Hope you enjoyed this presentation. I’ll do a mini-one for my overhead test on Monday and should get those results on Tuesday or Wednesday.
Pingback: The Results Are In | Random Nuclear Strikes