
This is not intended to be an instruction manual on the assembly of AR-15 rifles, only one of many references available on the web. If something here does not make sense to you, stop your assembly, check your assembly manual and consult a professional.
Lastly, if you blow your dumb ass up because this stuff is too mechanically intense for you, don’t go blaming me. Mine works fine. You screwed up.
OK. Now that we’re done with the disclaimer, let’s get down to what you’re going to need to get this job done.
First, you’re going to need an AR type lower receiver. You can buy this from most FFL’s, unless the gun itself is illegal to own in your locale. In that case, you need to move to a place that doesn’t suck.
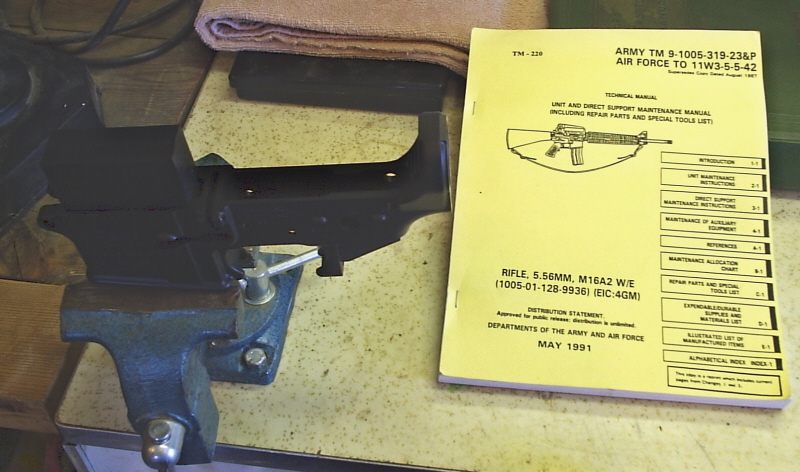
You will also need the TM-220 Manual shown in the above photo. Seriously, I don’t care how many AGI videos you’ve watched, that manual has so much reference material in it that you won’t want to read it all in fear of your head exploding. Yes, it has typos, but the photos and sketches might just save your ass some day.
Secondly, you will need these tools
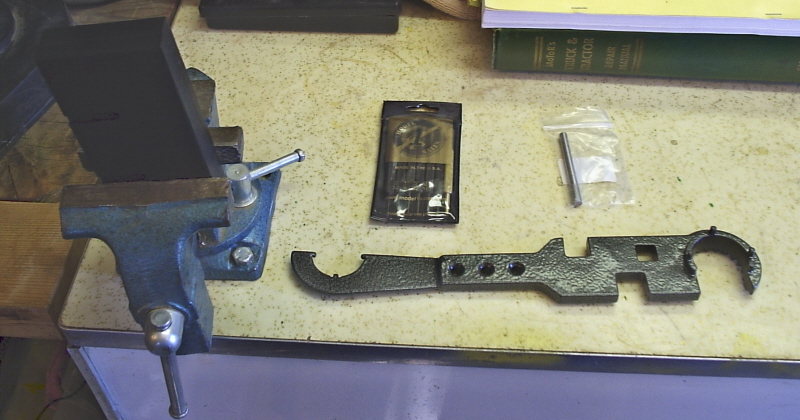
From left to right:
A vise
A vise block (this slips into the magwell of the lower to provide a very necessary “third hand”. Not absolutely needed, but trying this for the first time without one is asking for necessary parts to go flying around your workspace. They range from $20 to “Stupid Money”. I like and use this one.)
A stock tube wrench (This is the one shown. It is an all in one tool. This one will do just fine.)
A number of punches (This is the one shown. You will not need all of the ones in that set for lower receivers, but if you ever plan on assembling barrelled uppers, just buy the set and you’ll be done.)
And a Pivot Pin Detent Installation Tool (This also is not absolutely necessary to have, but it makes the job so much easier that you should just spend the $5 and get it.)
Parts:
You will also need the parts you are planning to assemble into your lower receiver.
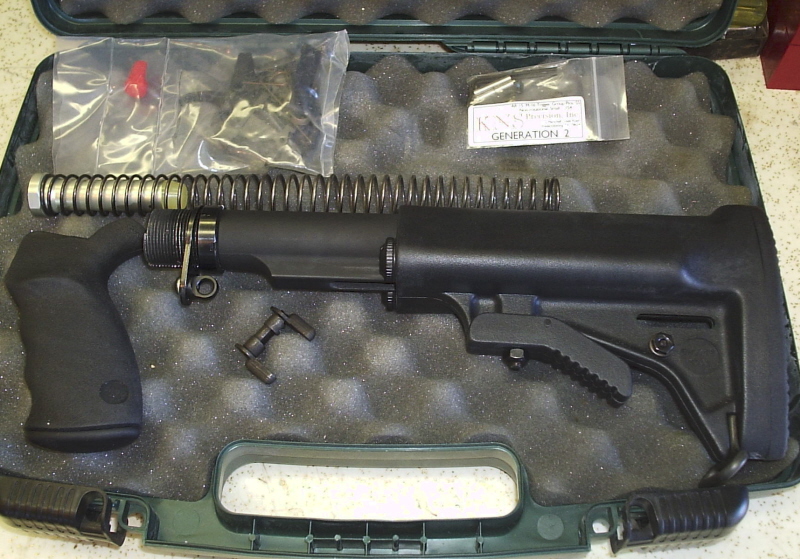
As you can see, I will be adding a few aftermarket pieces to mine during this assembly. From upper-left to lower-right:
Pile-o-parts. My lower is from CMMG, so I ordered my internal parts through them as well. This is how they arrived. The red bit is an Accuwedge they added in for a nominal fee.
To their right are the KNS Anti Rotational trigger and hammer pins. Not absolutely necessary. But if you’re building a 9mm caliber gun or have plans to install a suppressor in the future, these aren’t a bad idea.
Directly under the Pile-o-parts is my recoil spring and buffer. They came with the stock.
Below that on the left is the Ergo Grip. Great for right handers. Not so great for southpaws.
Next to that is the Choate collapsible stock I selected with the Blackhawk! single point sling attachment point already on the tube (good luck finding that).
And lastly, in the center bottom, the ambidextrous safety upgrade part I ordered from CMMG.
I’ll back in a bit with Part 2, the actually assembly.
UPDATE: Of course, I forgot three essential tools:
1. A small tapping hammer, and
2. A 3/16 Allen wrench, at least 5 inches in length, preferably a T-handle type, and
2. Painters tape
I’m sure you can figure out easily enough what the hammer is for, and that the Allen is for your grip screw. The tape, on the other hand, is for masking off your receiver to prevent superficial damage from the hammer and your punches.
Does the vise need to be secured to the table, or is it okay just staying put by its own weight?
I’m actually getting the parts together to build a CA-neutered AR. I’ll be looking forward to your post on the assembly, since I’ve never done this before.
The vise does need to be secured, C-clamps will do though.
Glad to see someone taking the plunge, Kevin.
I broke down and reassembled the lower on my Colt H-Bar. Frankly, I’ve seen cap pistols that were more complicated. The upper is another matter but that’s mostly with installing the barrel.
Pingback: Random Nuclear Strikes » AR Lower Parts Kit Assembly: Part 2
Pingback: Random Nuclear Strikes » AR Lower Parts Kit Assembly: Part 3